I can’t believe how ice fishing is becoming much easier since you can navigate your fish waypoints and routes back and forth. Plus, the advantage of sharing fish waypoints with other anglers. This sounds quite interesting. And that’s why I am giving you the good news that all this is possible with the new Garmin Striker 4 for ice fishing. In this guide, I will explain to you how to set up and use Garmin striker 4.

At first, I couldn’t stop getting the adrenaline rush of borrowing other fishers’ waypoints. But after using the Garmin striker 4, at least I am now getting used to all these cool capabilities. I made this guide to show you how you can set the Garmin Striker for ice fishing. Let’s get into details of the Garmin striker 4 reviews.
How to Setup the Garmin Striker 4
Generally, when talking about setup, think of things like rigging, mounting, and accessories. These are the three major key components of setting up your Garmin striker in your kayak. Other necessary things include how you want your accessories, for instance, the eye transducer appearing.
Still, in most cases, if you plan to move around a lot, the eye transducer should be safely secured. You would also want to consider the components of your Garmin Striker 4 so that you get acquainted with them for easy use while setting up.
Ensure that you can have enough when it comes to adjustability, which will make it very easy for you to move around the mounted Garmin Striker. So make sure the mounted Garmin Striker is very stable and secure. Always ensure that you have an overall solid base to give you the best performance and results.
Here is a list of the to-do things regarding the Garmin Striker 4 setup:
- This is the most essential and basic step when mounting. Using the RAM 1-inch mount ball is very super easy to use. You only need to slide the RAM ball along the rails to ensure it is tight enough. The advantage of using the amount is they tend to provide a super sturdy mounting base. This ensures all your tools are secure for the best performance.
- The next step in setting up is mounting the RAM light-duty accessory. As I said earlier, having a sturdy base will greatly affect your overall fishing performance. So always ensure that you have your mountings tightly secured. The RAM light-duty accessory, so you need to keep it loose. Then by sliding, it ensures it slides over the one-inch RAM ball mount and then tightens it.
- The third and the final step of setting up the Garmin Striker 4 is mounting the Garmin Striker itself on top of the RAM light-duty accessory mount. This is usually very easy to do and by just sliding on the RAM light mount. Always ensure the striker has attached itself without much struggle.
- Use the user manual and ensure all the components are working in line with Garmin Striker 4. This includes the batteries, the eye transducer, flasher, and also the Garmin striker 4 display.
How to Use the Garmin Striker 4
The best thing about this amazing Garmin Striker 4 is that it is very easy to use. It has a one-of-its-kind user interface, which is unique. The interface is easy to use even on different modes, and this will tend to vary with your kind of application. The traditional mode always enables one to get the bottom orientation information of any deep water obstructions like fish arcs.

It can sometimes get a bit difficult to get the exact details of arcs, but thanks to this feature, that eliminates all obstructions. The split frequency mode allows one to get images of between 70 Hz up to 200 Hz making it possible to see all sides of your ice fishing spot.
Garmin Striker 4 Review
Established in 2016, Garmin Striker 4 has proven as one of the most reasonable fish finders in the whole striker series. From real customer review is renowned as the best fish finder for beginners and causal fishers.
Following the striker series success, Garmin striker 4 has proudly announced it with Clear VU technology. These devices are designed to allow you to mark your favorite fishing spot and easily navigate back to it tomorrow, saving you time and money.
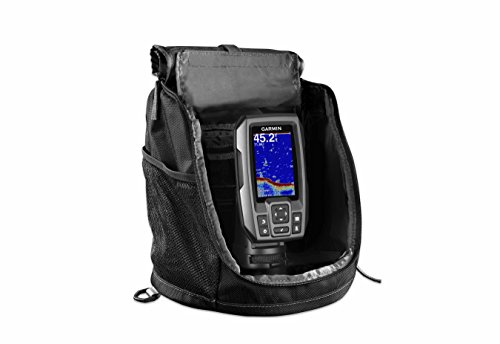
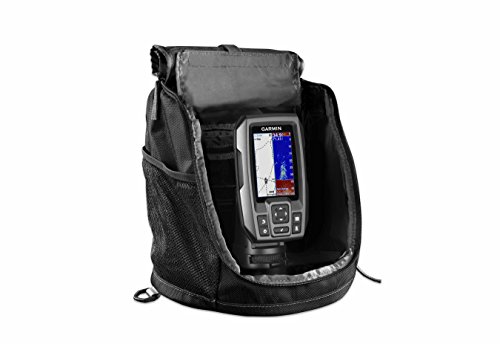
A portable kit is available to protect and carry your STRIKER fishfinder with GPS, so it’s perfect for kayak, canoe, or ice fishing. It includes a sealed, rechargeable battery with charger, built-in transducer cable management, storage, suction cup transducer mount, and float.
Garmin Striker 4 with Portable Kit
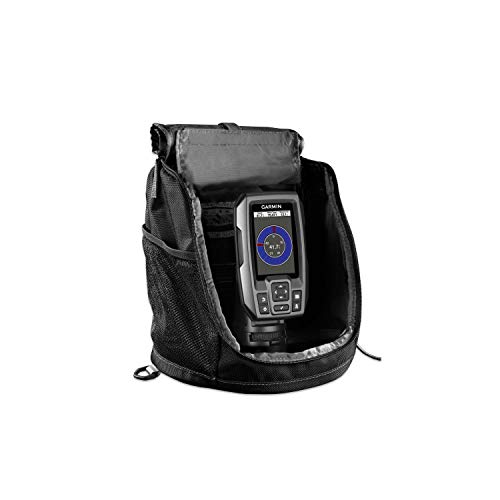
STRIKER 4 Portable Bundle3
- 3.5-inch CHIRP Fishfinder with GPS and Portable Kit.
- Easy-to-use 3.5-inch color fishfinder with built-in, high-sensitivity GPS
- A portable carrying case is perfect for kayak, canoe, or ice fishing
- Find fish; mark and return to hot spots, docks, and ramps
- Includes CHIRP (77/200 kHz) sonar transducer; transmit power
- Upgrade to high-performance CHIRP with a GT8 or GT15 transducer (each sold separately)
Several Frequencies
The dual-beam transducer uses Garmin CHIRP traditional solar. This means that the Garmin striker can send several frequencies that will tend to range from low to high at once.
Waterproof
And its IPX7 waterproof feature will always ensure that your striker to withstand rainy seasons. But always ensure you do not submerge it fully in water as it is not suitable to withstand that.
Accessing Locations and Waypoints
You can also access your location, thanks to the waypoint maps. Plus, section number mode sometimes comes in handy, especially when you are not very familiar with your fishing area. This is because it will always display your GPS coordinates.
The striker flasher is an essential component; ensure the display can adapt according to water depth. Whenever you move to different water depths, remember to check whether the display has adapted the water depth before using it.

The screen display of this Garmin Striker is always the best when it comes to readings. Regardless of whether you are in a low lighting area or a bright region, the display screen never disappoints. You will still be able to get your readings very easily without much strain.
Battery Life
The battery life is very good when it comes to its output performance. If charged correctly, it can last a few fishing trips. Additionally, it has an indicator light to let you know when the battery is charging correctly. This is very handy, especially when you feel worried that you didn’t charge the battery correctly.
Conclusion
The Garmin Striker 4, fishing, is taken to another level. This device helps you navigate through your previous waypoints without really going physically to each waypoint. The GPS coordinate feature gives you the overall security that you need. This is especially if you are not conversant with the fish area.

Plus, the fact that you get a display of the hard-to-reach places like the fish arc makes it deliver more. Setting it up for ice fishing is not a complicated task. I have given you the essential steps that you need to follow. Get this amazing set and watch how your fishing story changes drastically.